Track Car Project - Part 2
Previously, we talked about building a budget track car that could do double duty as a track car and as a performance oriented daily driver. In our first installment, we procured an Audi A4 quattro and began repairs, planning our upgrades and ordering parts.
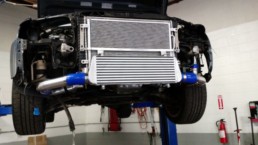
With the new engine, transmission and sway bar mounts in place, we began to work our way forward starting with a new radiator. As the stock radiator support was trashed, and includes piping to the factory side mount inter-cooler that we will not need, we decided to fabricate a new support from thin wall box tubing. This will be a foundation for the radiator, AC condenser and new front mount intercooler.

With the new support in place, we installed the radiator and connected the radiator hoses and transmission cooling lines. Next, we installed the AC condenser which mounts to the radiator.

As we test fit the stock bumper as a guide to determine location of the intercooler, we used the mounting hardware provided by CX Racing. As we were using a non-factory radiator support, we made our own lower mounts from steel bar stock. The intercooler kit was pretty good out of the box, but we did need to re-tap several of the threaded bosses. The silicon hoses and clamps worked well.

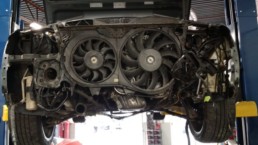
First we installed the cold side connections to the throttle body, and made some minor modifications to our support in order to attach the new AC hose which connects the condenser to our new AC compressor.

As we moved over to the pressure side, this was a great time to upgrade the turbocharger and exhaust manifold to make greater use of the increased capacity of the new intercooler. We removed the stock K03 turbo and cast iron exhaust manifold, along with the stock cat, downpipe and exhaust system. The system on our car was not stock - it included Borla resonators and mufflers, but the pipes and mufflers were only 2" diameter.

We will be fabricating our own exhaust with some larger pipe. There are many good kits available on the market as well.
For this stage, we are moving up to a K04 turbo which includes a larger compressor wheel, and a stainless steel equal length header that has been wrapped to keep the heat in the pipe which will not only benefit the turbo, but will reduce under hood temperatures.

We used Allen head bolts to attach the turbo to the header as the normal hex bolts would have been more difficult to manage, and then installed as a complete assembly. A new oil pressure line will be needed for several reasons. First, there is mechanical interference with the header. Secondly, we want to keep the oil as cool as possible, so routing it away from the pipes is a benefit. Lastly, a new pressure line is recommended with installation of a replacement turbo. If we weren't replacing the line for the first two reasons, removing it and flushing it with solvent and compressed air would be a minimum precaution.

With the new turbo and header in place, we continued the installation of the coolant feed and return lines, oil drain back line and turbo brace.


We removed the factory air cleaner box and are installing a new reinforced silicon intake hose that will connect the mass airflow sensor and less restrictive air filter. This will require some further work with tube and clamps to plumb in the check valve for crankcase vent, re-circulation valve and electronic boost control.
We've ordered all new front end control arms and steering components, along with a set of H & R coil overs and Hotchkis front and rear sway bars. These have all arrived, so in our next installments we will tackle the suspension and fabricate a new down pipe and exhaust system.
Track car project - Part 1
We thought it would be a lot of fun to build an affordable HPDE/track-day car that could also double as a spirited daily driver. We also thought it would be fun for our readers to be able to follow along and watch our project progress to a track day finale.
We chose one that would reflect what we see with many of our customers who have dual use cars of this type. We looked for a car that would accommodate a range of drivers comfortably, retain key amenities like air conditioning and a full interior to allow the vehicle to be driven comfortably to the track or to function as a second car when needed. We felt it should be mid-sized, turbo charged, and preferably all-wheel-drive (AWD) for more predictable traction and handling under a wide range of weather and surface conditions. We also felt that a passenger (or instructor) should fit comfortably, and the car should have ample storage for tools, gear, and maybe even the occasional bag of groceries. With all that in mind we set our sights on finding an affordable Audi A4.
A search of local classifieds netted a number of Audi A4 B5 or early B6 models that are inexpensive, and enjoy a wide range of aftermarket options that can improve acceleration, handling, braking, safety and reliability.
![IMG_20160721_175638372_HDR[1]](http://www.apc.jaketomberlin.com/wp-content/uploads/2016/08/IMG_20160721_175638372_HDR1-e1470882289784.jpg)
Our project car was previously involved in a minor off road event that damaged the bumper cover, radiator, AC condenser, side mount inter-cooler, and several engine and transmission mounts. Since we planned to change out many of these items in the process of the build, this was a limited concern to us. That meant that we purchased it at a bargain price to boot! Others of you out there might want to start with an undamaged vehicle for slightly more money and have less things to return to undamaged condition.
Our project build will be performed in multiple installments focusing on upgrades to the engine, suspension, brakes, wheels & tires. The body and interior mods are expected to include some carbon fiber panels, roll bar (or semi-roll cage), seats and harnesses. We want our approach to reflect the journey an enthusiast might go through as they build their own dual-purpose track car. Suspension, engine, and brake components often need to be updated in stages as improvements in other areas such as power create an imbalance in the factory equation. For example, significant power increases will dramatically increase speed entering a corner, resulting in the need for improved grip from the suspension and tires, and larger brakes to slow things down and dissipate the heat effectively to avoid brake fade or warped rotors and may overpower other drive train components like the factory clutch.
For our initial work, we are disassembling, assessing damaged and worn out components, then ordering replacements along with our first round of upgrades to the suspension and engine. After raising the car on a lift, we removed the bumper cover and bumper assembly, the damaged AC compressor, condenser, radiator, headlights and various mounts and sub assemblies. This gave us a list of things to consider for upgrades as well as replacements. This also gave us a view of vehicle components and structure that is not usually seen.
![IMG_20160722_134244714[1]](http://www.apc.jaketomberlin.com/wp-content/uploads/2016/08/IMG_20160722_1342447141-e1470882642444.jpg)
The damaged side mount inter-cooler and piping were removed, along with the cross pipe and radiator mounts. The oil pan needed to be replaced along with several engine, transmission and sub-frame mounts.
![IMG_20160722_093734351[1]](http://www.apc.jaketomberlin.com/wp-content/uploads/2016/08/IMG_20160722_0937343511-e1470882543481.jpg)
Note the shattered aluminum mount - this provides the the driver side mount points for engine mounts, anti-sway bar, and connection to body and sub-frame. The damaged loop of tubing provided minimal factory cooling for the power steering system. This will be replaced by a dedicated cooler as the build progresses.
A used replacement bracket was sourced for less than $30 online.

The driver side transmission mount bracket was also replaced for about $20. There are a number of websites that sell used parts from salvage vehicles. This was the most cost effective way to source these parts. We also replaced the associated bushings and mounts with new pieces as these were readily available from our parts suppliers. For many of you an alternative would be a pull-it-yourself auto recycling yard such as LKQ.
Note the blue numbering indicating the inventory numbers from the salvage vehicle this bracket was removed from. When inspecting a used vehicle for purchase, look for these type of tell tale numbers which can alert you to parts that may have been replaced as the result of an accident or complete failure (as with engines, transmissions, differentials).

The oil pan had a hole in it and needed replacement. With the oil pan removed, it is an opportunity to visually inspect for any other issues including signs of sludge and carbon build up, and ensure to the oil pickup screen is clean and undamaged.

This was also a good time for a bit of research as we consider engine mods once the initial restorative work is done and we have a baseline to work from . We found a helpful resource in Integrated Engineering's website, covering the variations in the five valve 1.8L VW / Audi engines. For now we will keep the stock bottom end, but if we want to increase power significantly while maintaining reliability, it may be time to build a fresh engine with stronger rods, and hardware.
![IMG_20160813_144453929[1]](http://www.apc.jaketomberlin.com/wp-content/uploads/2016/08/IMG_20160813_1444539291-e1471201600670.jpg)
With the new oil pan in place, we'll take a break and be on the lookout for the UPS and Fedex trucks. Our upgraded suspension parts are starting to arrive, so in Part 2 of the project, we will begin our upgrades - focusing on the new coil over suspension, larger sway bars, new control arms and tie rod ends. Stay tuned!
Cryo treated drilled rotor upgrade for C5 Z06 Corvette
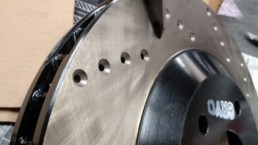
The drilled rotors on this C5 Z06 had nearly 100,000 miles on them and having survived two pad changes worth of wear and prior turnings were now down well below the min 30.60 mm (1.205 inches) thickness on the front. Time for new rotors along with fresh pads.

For daily street / performance driving, we went with a set of Stop Tech Cryo treated rotors and Akebono pads. The rotors are cross drilled and each hole is counter sunk to reduce risk of cracking at the holes. The rotors are pre-conditioned over a 24 hour period by cooling them to -300F and then warming them to normal temperature and then heating them to +300F and then cooling them again. This process permanently changes the structure of the metal improving durability including abrasion resistance, and improves dimensional stability and resistance to warping.


Cryo treatments are increasingly finding their way into many race applications and commonly used on cranks, rods, heads ,valve springs, gears and rotors. If you track your car or are looking for additional performance and longevity from your brakes, ask us about pricing and availability of cryo treated rotors during your next pad and rotor service. A variety of standard, slotted, cross drilled versions are available from several leading suppliers.
Intermittent check engine - P0120 on BMW 528i
OBD II self diagnostic trouble codes have made it easier to understand and troubleshoot issues in 1996 and newer vehicles. However, intermittent codes that occur randomly over varying periods of time can be more difficult to conclusively pin down as the code given may or may not be directly caused by the component indicated.
In this particular case with a 1999 BMW 528i sport wagon, the check engine light and underlying P0120 code was being set at various intervals. This symptom could occur immediately upon startup, or after extended drives which made the process of resetting the code and then reproducing the code again, a someone time consuming process.
 The accompanying symptoms were sluggish performance and a shutter when the accelerator was pressed. The code indicated a problem with the throttle position sensor which tells the car's computer how much throttle input is being given.
Often, the throttle position sensor is attached to the throttle body and may be replaced separately. In this particular case, and increasingly more often in newer drive by wire vehicles, the entire throttle body must be replaced as a complete assembly.
It is possible that cleaning the throttle body to remove carbon build up around the throttle plate could resolve some symptoms that occur at idle and could be a could low cost first step, especially if the sensor cannot be replaced independently. This particular throttle body had been previously cleaned .
Oil cooler upgrade improves 370z track readiness
This 2015 370z sees some track day events and the owner noted that oil temperatures had been creeping up a bit and wanted to add an oil cooler to improve reliability and endurance at the track. As with many performance oriented vehicles, the factory included an oil cooler which makes use of engine coolant. This helps stabilize oil temps, and can also help to get oil up to the proper temperature sooner under cold weather conditions, but under sustained performance driving this adds additional heat to the cooling system that is already being taxed.
Adding an external oil cooler helps keep things under control. Since the car will be driven year round, the owner opted for a thermostatically controlled cooler that allows cooling flow after a preset temperature. This lets the oil come up to temperature sooner and compliments the factory system by maintaining the adaptability of the system to deal with a range of weather and driving conditions.
In consideration of the owner's desire for a high quality cooler that would work under a range of conditions, and offer long term durability, we sourced the components from Z1 Motorsports and opted for the mid sized 25 row cooler with several upgrades including a Setrab core, a thermostatic adapter, and braided stainless lines with an outer protective wrap.
The installation was very straightforward, but required dis-assembly of the front bumper cover and assorted components to easily mount the cooler and route the lines properly.

The cooler core arrived with several well designed brackets that allowed placement in a location the factory had intended, and had already provided lower mounting locations for. The holes in the cooler bracket aligned well with only the right side requiring a bit of elongation for a perfect fit. The hose were routed, and the protective covers added additional insurance against chaffing. We elected to add some additional protective material over the hoses where they pass through the sheet metal of the radiator support and the passenger inner fender.

Under the car, the thermostatic adapter installs between the filter and the existing coolant based oil heat exchanger. This is a perfect time for a fresh filter and oil change, and the cooler core must be pre-filled with oil as it holds a significant amount (over a quart). Space is tight, and this will make future oil changes a bit more challenging.

After the install and warm up, oil temps were stable at approximately 160 degrees and would rise to 170 during driving. We will update with results after a day at the track...
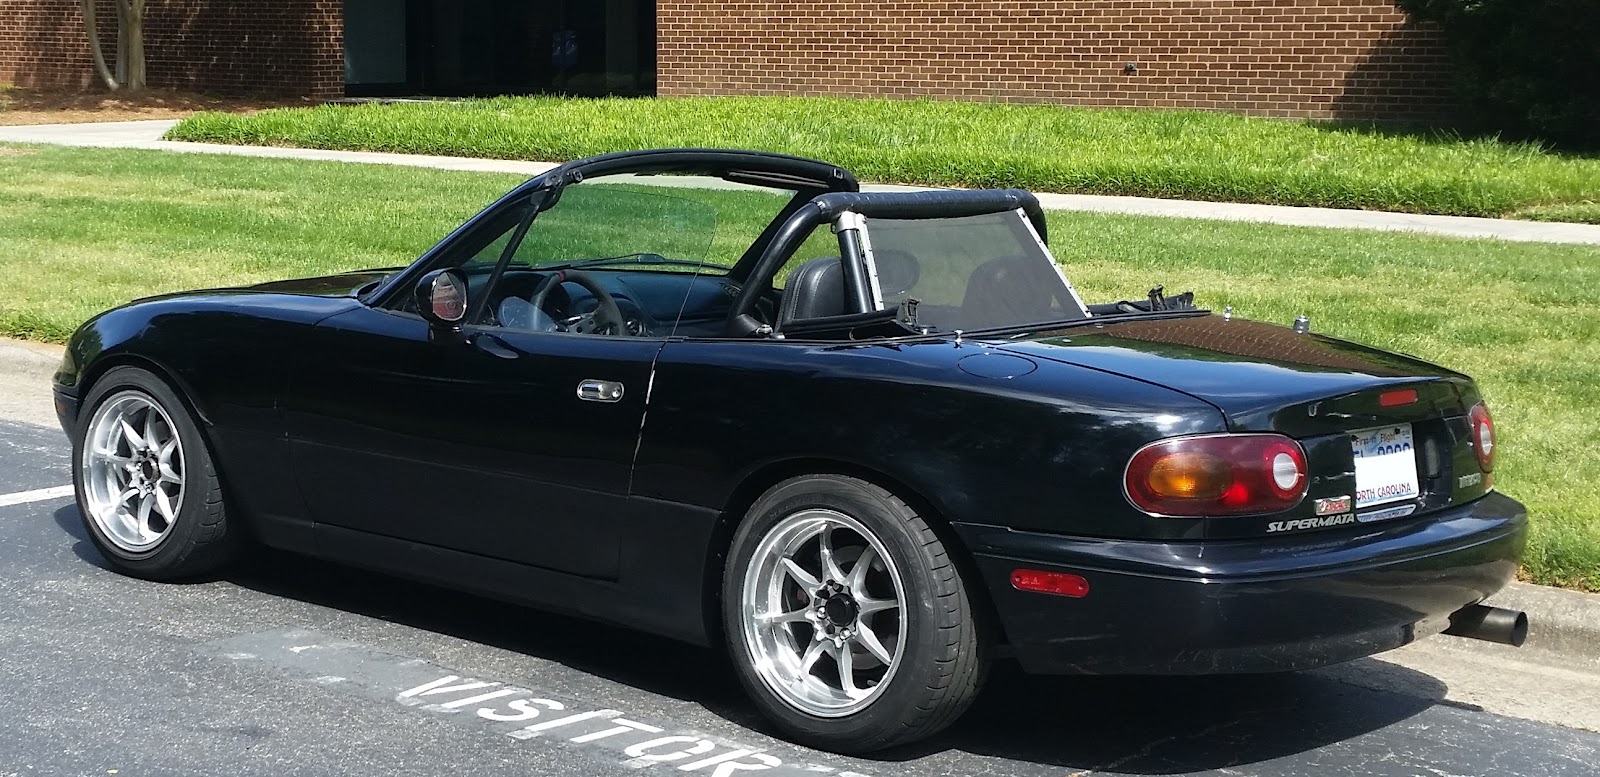
Amazing Customer Fabricated Turbo Miata
As noted in our last post, it was great to host the triangle miata club at Automotive Performance & Chassis for a spec alignment and corner balance clinic featuring a track prepped Miata. I really enjoyed the day, and a high point for me was the opportunity to check out all the amazing work that the club members had done on their own cars! Something drew me to Mike Gordeev's wicked Miata.
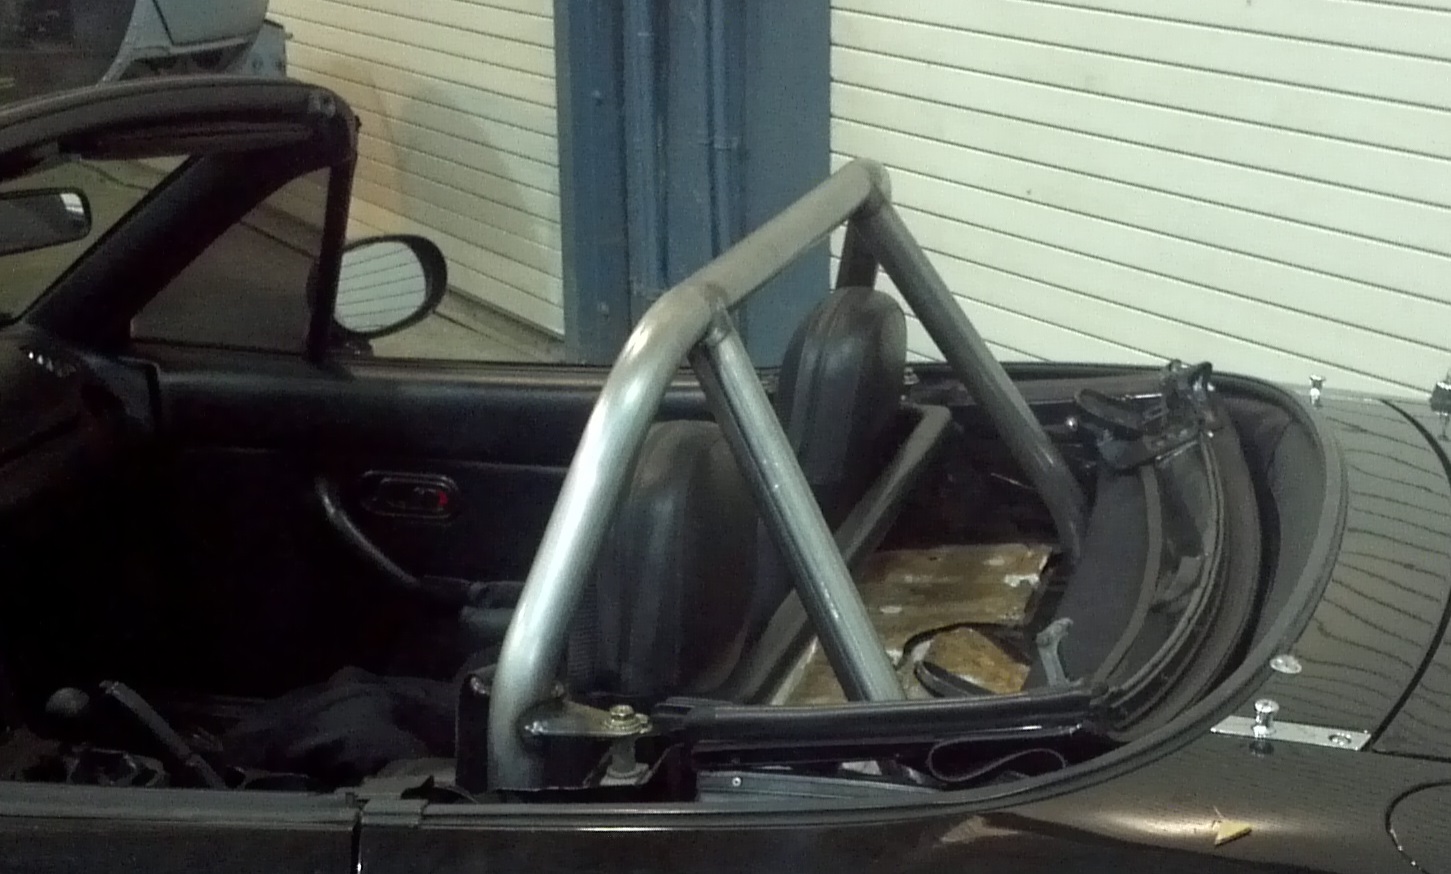
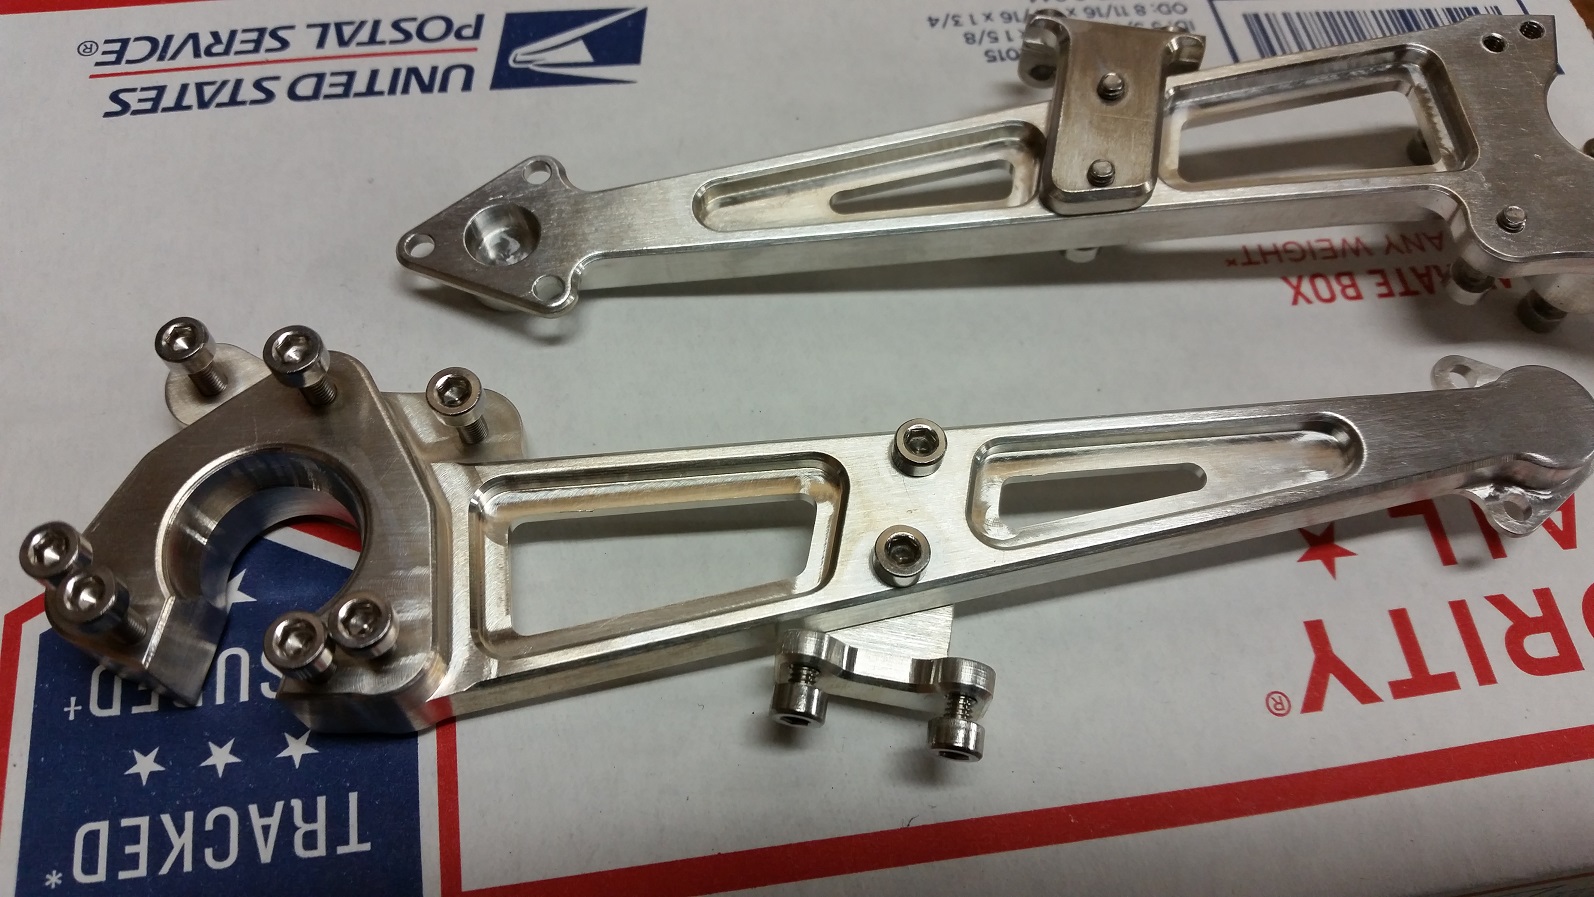
A quick look under the hood confirmed that this was no stock Miata! The turbo gave that away, yet it was all the details that drew me into a deeper discussion with Mike. He explained the long radiator hose that re-routed coolant to the rear of the cylinder head to ensure better cooling, and how this necessitated relocation of the coils. I noted that his strut bracing looked like a custom fabrication - it was. A Mike original. From there, Mike outlined more of his fabrication - the roll bar, the exhaust system, all the turbo plumbing, including the trick custom header.


And what was this? That looks like a Honda intake manifold? Sure enough, Mike used a Honda intake and fabricated a new flanges to bolt onto the Miata head, and to correctly clock the Miata throttle body. This brought us to the topic of his great looking TIG welds and where he got the flanges. I learned that he had machined them himself, and I began to realize the level of talent out there in the clubs!
Mike graciously tolerated all my questions and was good enough to oblige an interview and passed along a few additional photos...
Mark: Mike, what was your first self fabricated part on this Miata?
Mike: A rollbar. Sitting in the car realizing that if something were to happen, my head was the closest thing to a rollbar that the car had. That had to change. Coincidentally, I was just finished building a tube bender for a friend to use on his Jeep projects and I decided to break in the bender by using it to make my rollbar prior to handing the bender over to him.
Mark: Out of all the things you made, which pieces are you most proud of, and why?
Mike: I am most proud that I have been able to largely re-engineer many of the most essential power train systems such that they perform as good or better than what the Mazda engineers produced. I am proud when something I make is mistaken for a factory part.
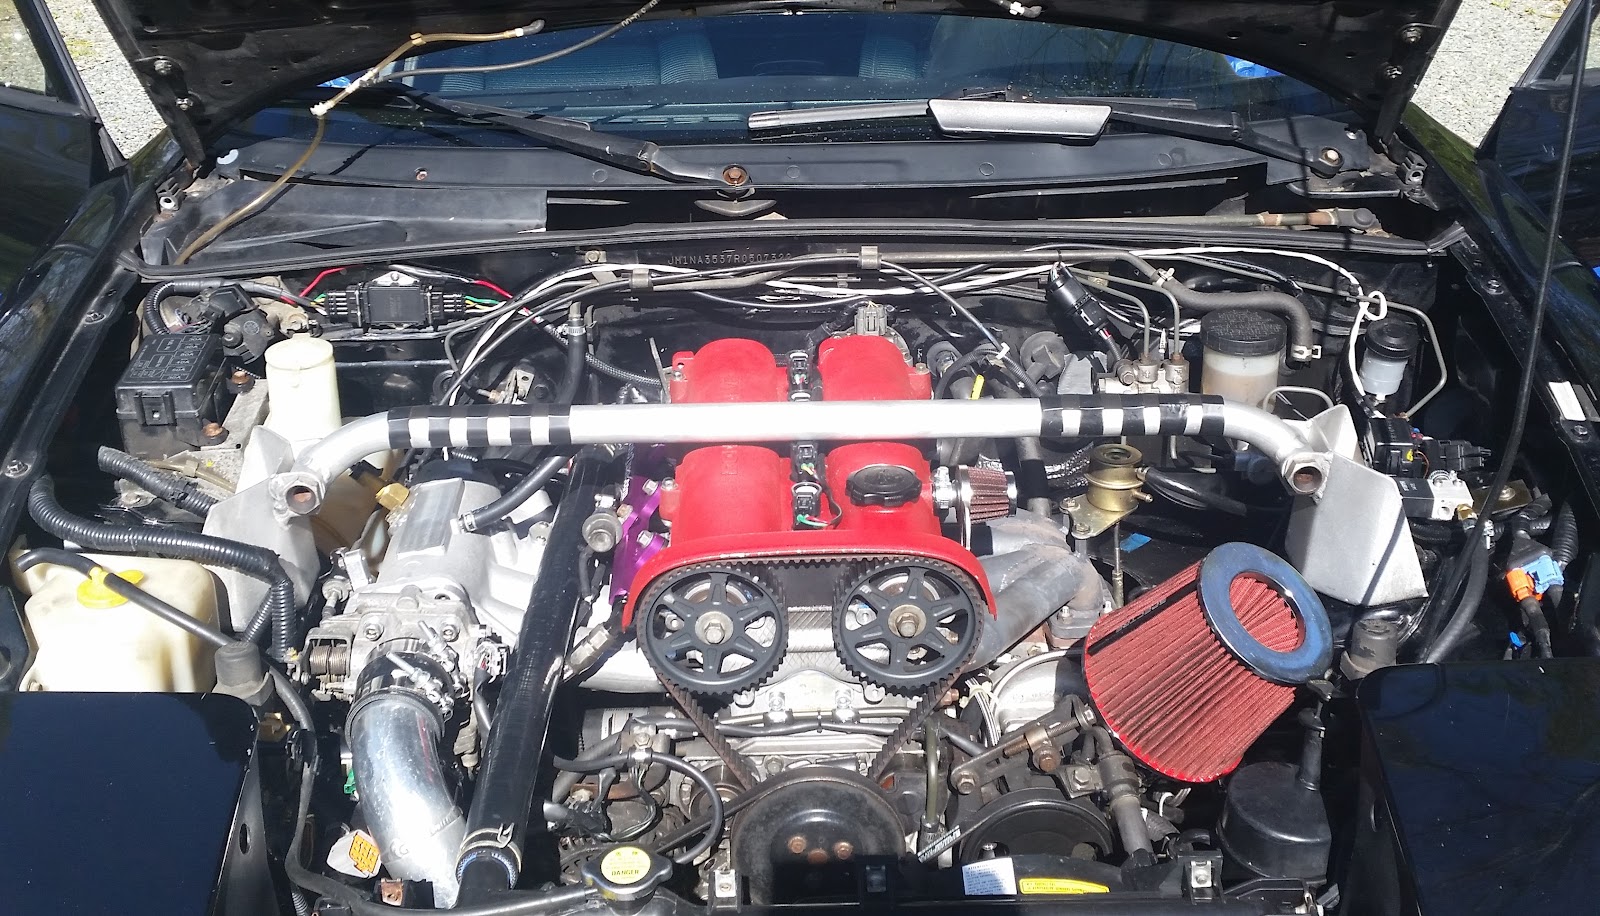
ChathamCNC miata engine bay.
Mark : Clearly you have gone well beyond bolt-ons and have a real vision for this car. What are your goals for this car?
Mike: The goal for this car is simple: bang for the buck power. I think I’ll be happy with 300whp, which on paper should give it slightly better power-to-weight than a c6 ‘vette. I have a turbo that will get me there sitting on my bench. The Miata is generally regarded as a cheap, unassuming, and generally slow car. With the added power it’s definitely fun to surprise a Mustang driver or two.
ChathamCNC Miata
Mark: I'm very impressed with your welding - you seem to do exceptional work with aluminum, stainless and mild steel. What kind of equipment do you use? What do you find most challenging to weld?
Mike: All of my welding is done using an old Thermal Arc 300 GTSW; an early industrial grade inverter TIG welder. I am trained in MIG and TIG, but prefer TIG over MIG as it lets me really focus on the quality of the weld. Welding as a skill is 10% knowledge and 90% practice. Every metal welds uniquely and so the hardest challenge is welding a metal on, which I am relatively out of practice. Often I will have a long period of work focusing on one metal and once it’s time to get back into another metal it will take me a little time to readjust my technique and way of thinking. In terms of pure difficulty, once you get a feel for each metal, none are any more difficult than any other, just different.
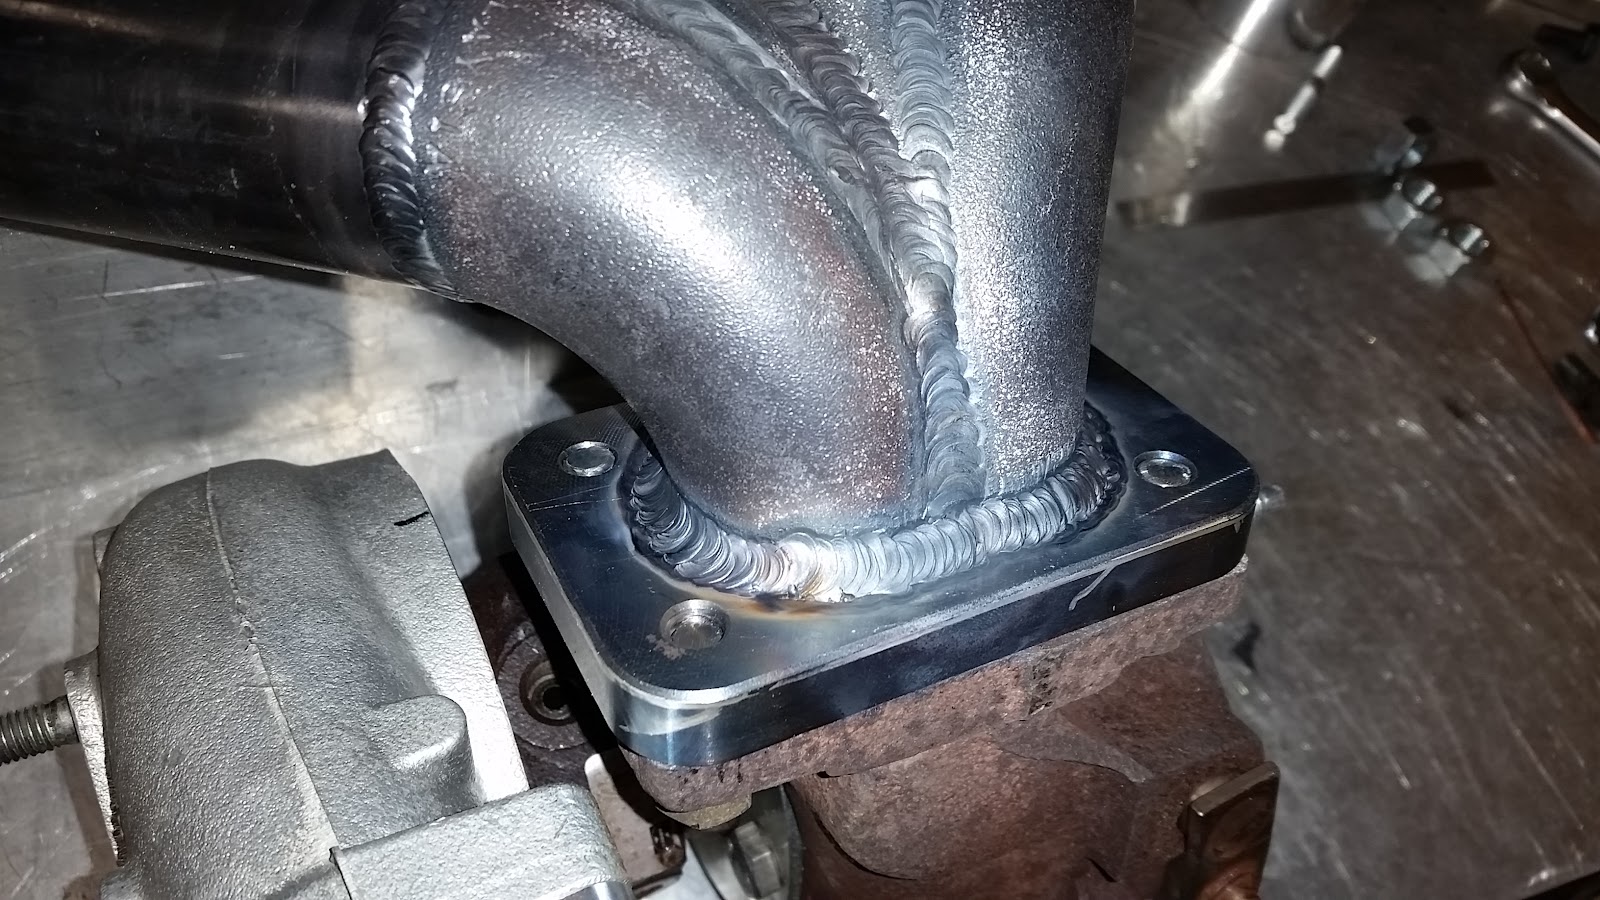
Exhaust manifold TIG welds.
Mark: The fabricated intake is really great. I understand you milled out your own flanges for the mount to the head and to adapt the Miata throttle body to the Honda intake (and fix the clocking). What did you use to mill this?
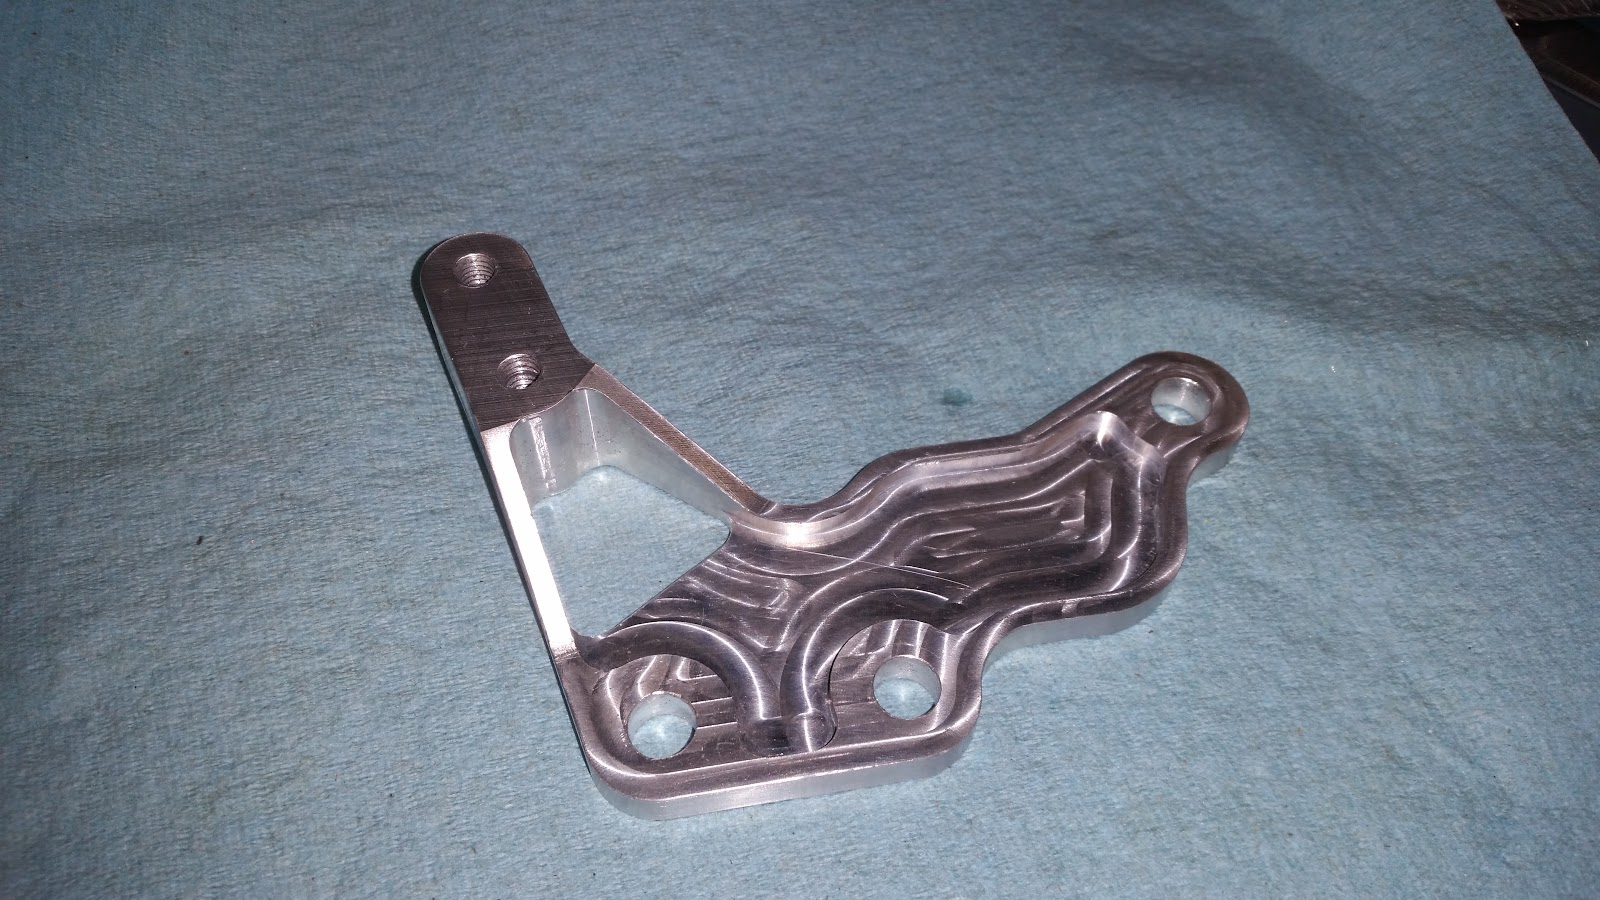
Mike: All of my milling work is done on my CNC mill. The CNC allows me to make complex parts, the thought of which would have made my head spin when I was turning dials on a manual milling machine. This machine in itself was an early project I designed and built a few years back.
ChathamCNC machined intake port block-off plate with integrated throttle cable mount.
ChathamCNC machined control link for vintage remote control truck.
Mark: So you built your own custom CNC mill? Why not buy a used commercial CNC mill? Did you just want the extra challenge of building your own custom tools?
Mike: It all started out with seeing what was available and then saying, “I can make that.” I had a very well equipped machine shop at my disposal at the time so I went from an idea to a functioning mill within a few months. At the time I started building my mill, I didn’t have any real use for it. I was basically building it for the sake of building it. I was a manual machinist and had no experience in CNC. Luckily the things that make a manual machine good also apply to a CNC machine, so I designed the CNC with my manual machine experience in mind.
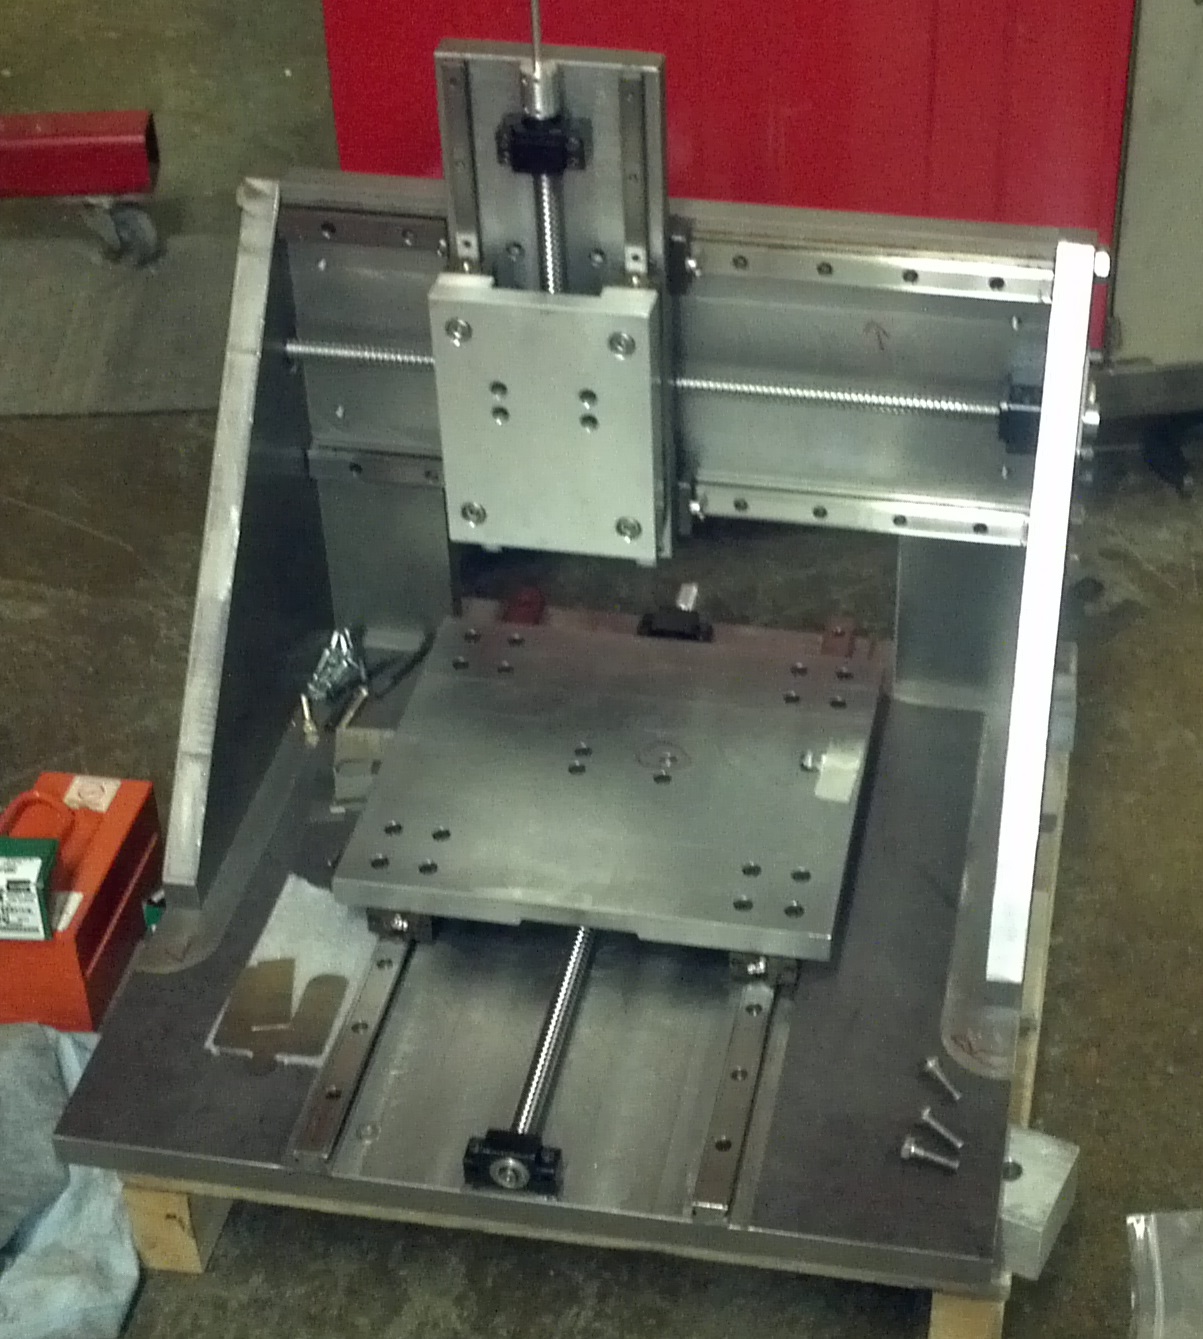
CNC milling machine construction
CNC milling machine initial assembly.
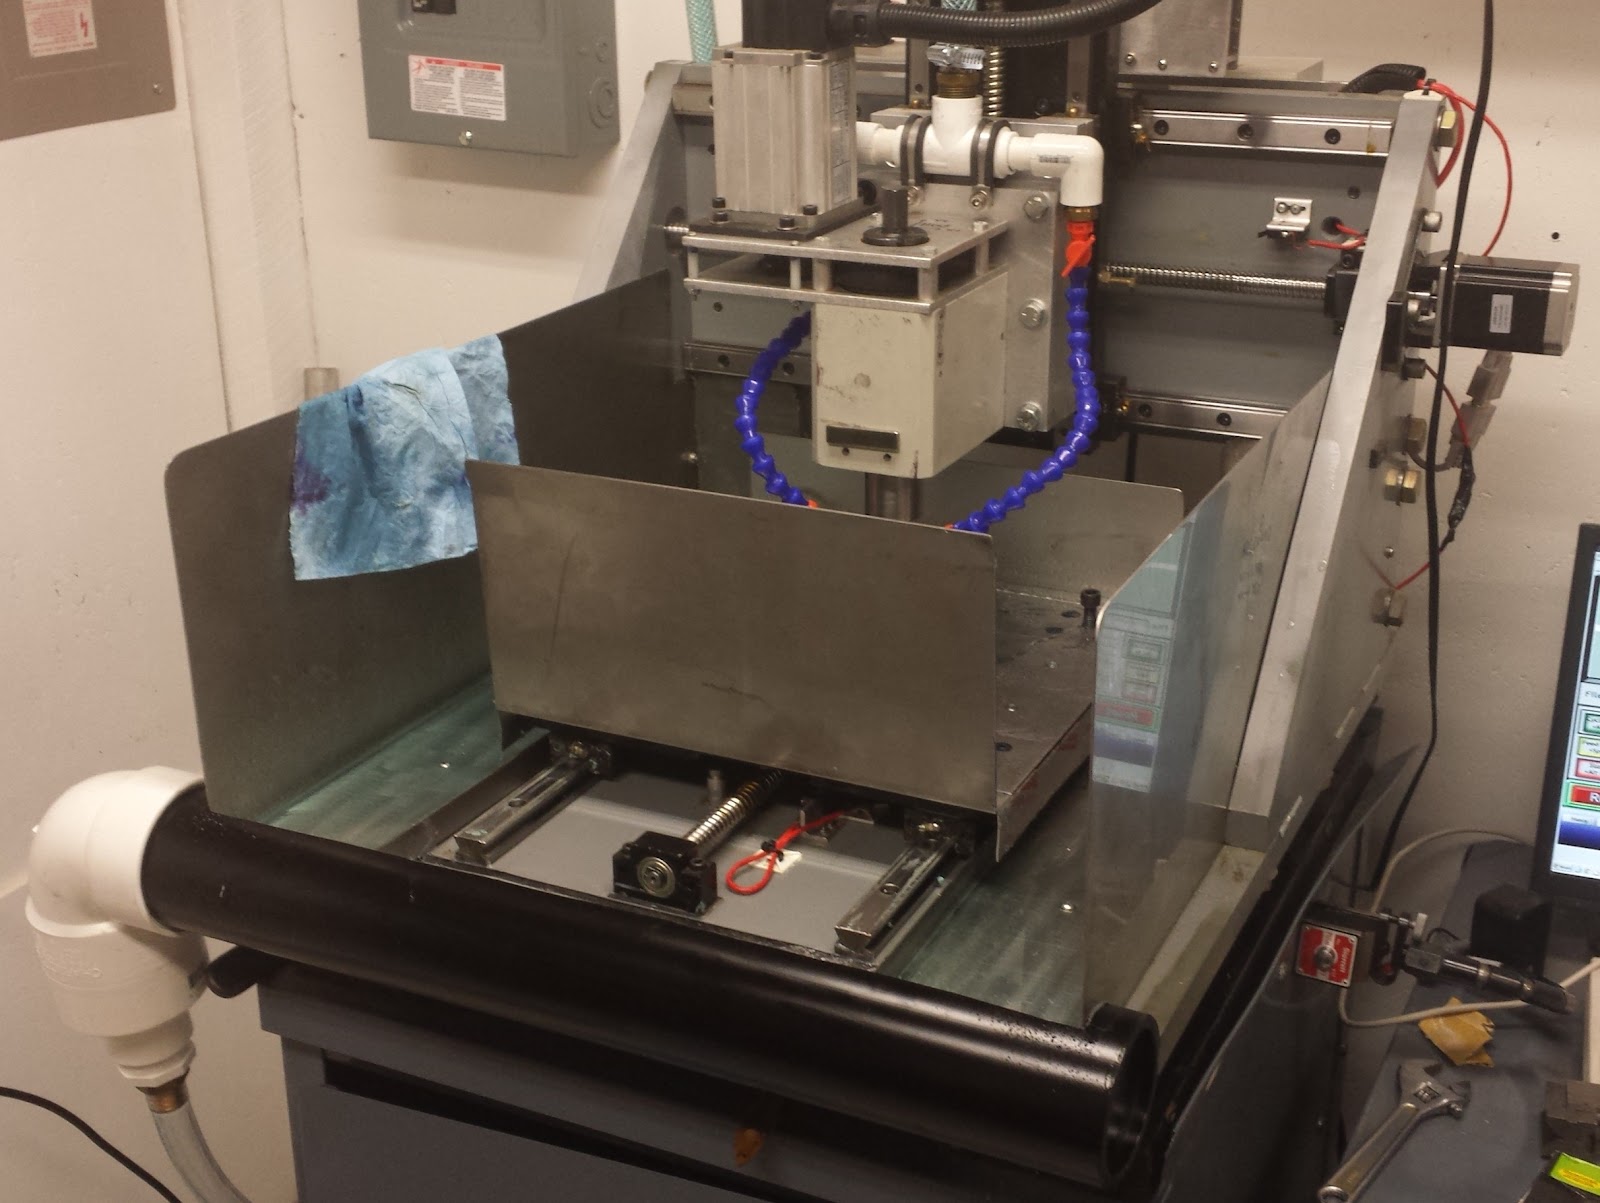
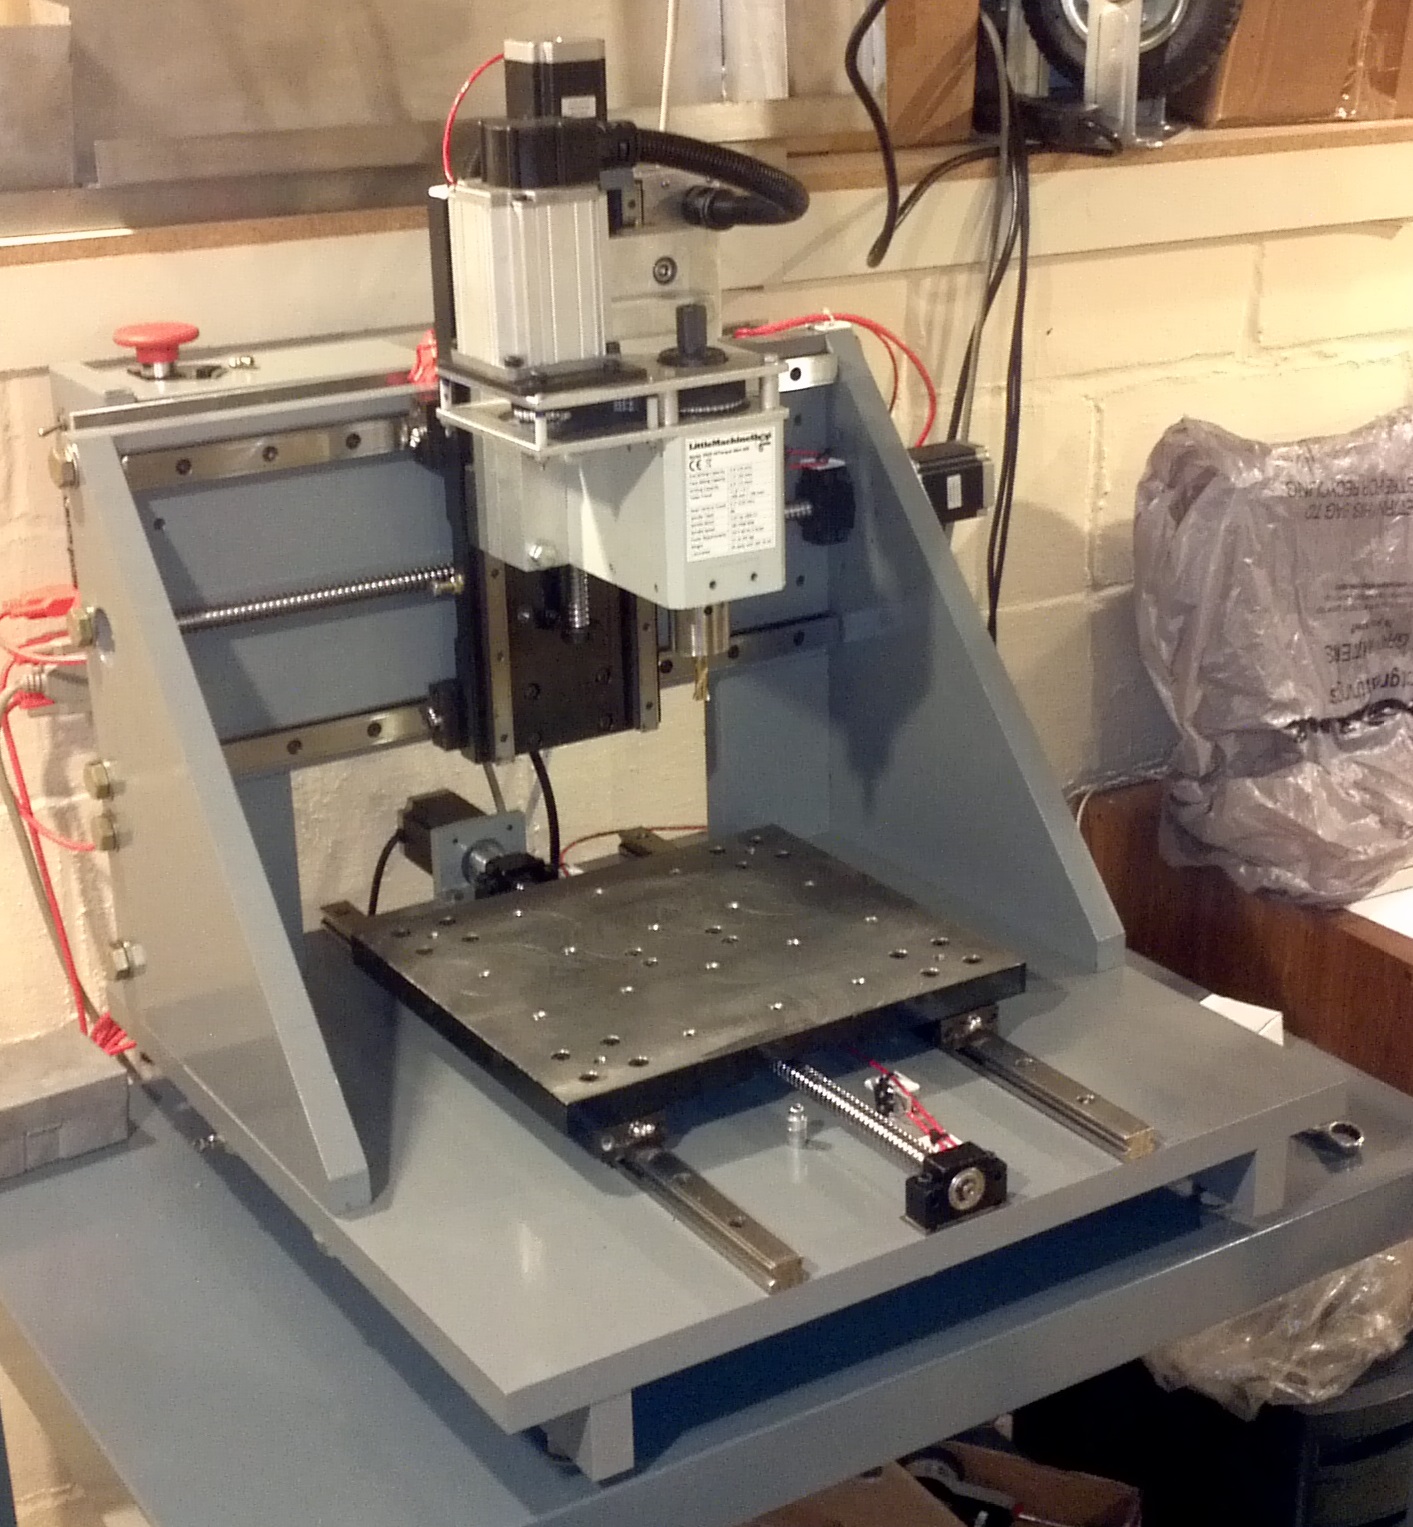
CNC Milling machine.
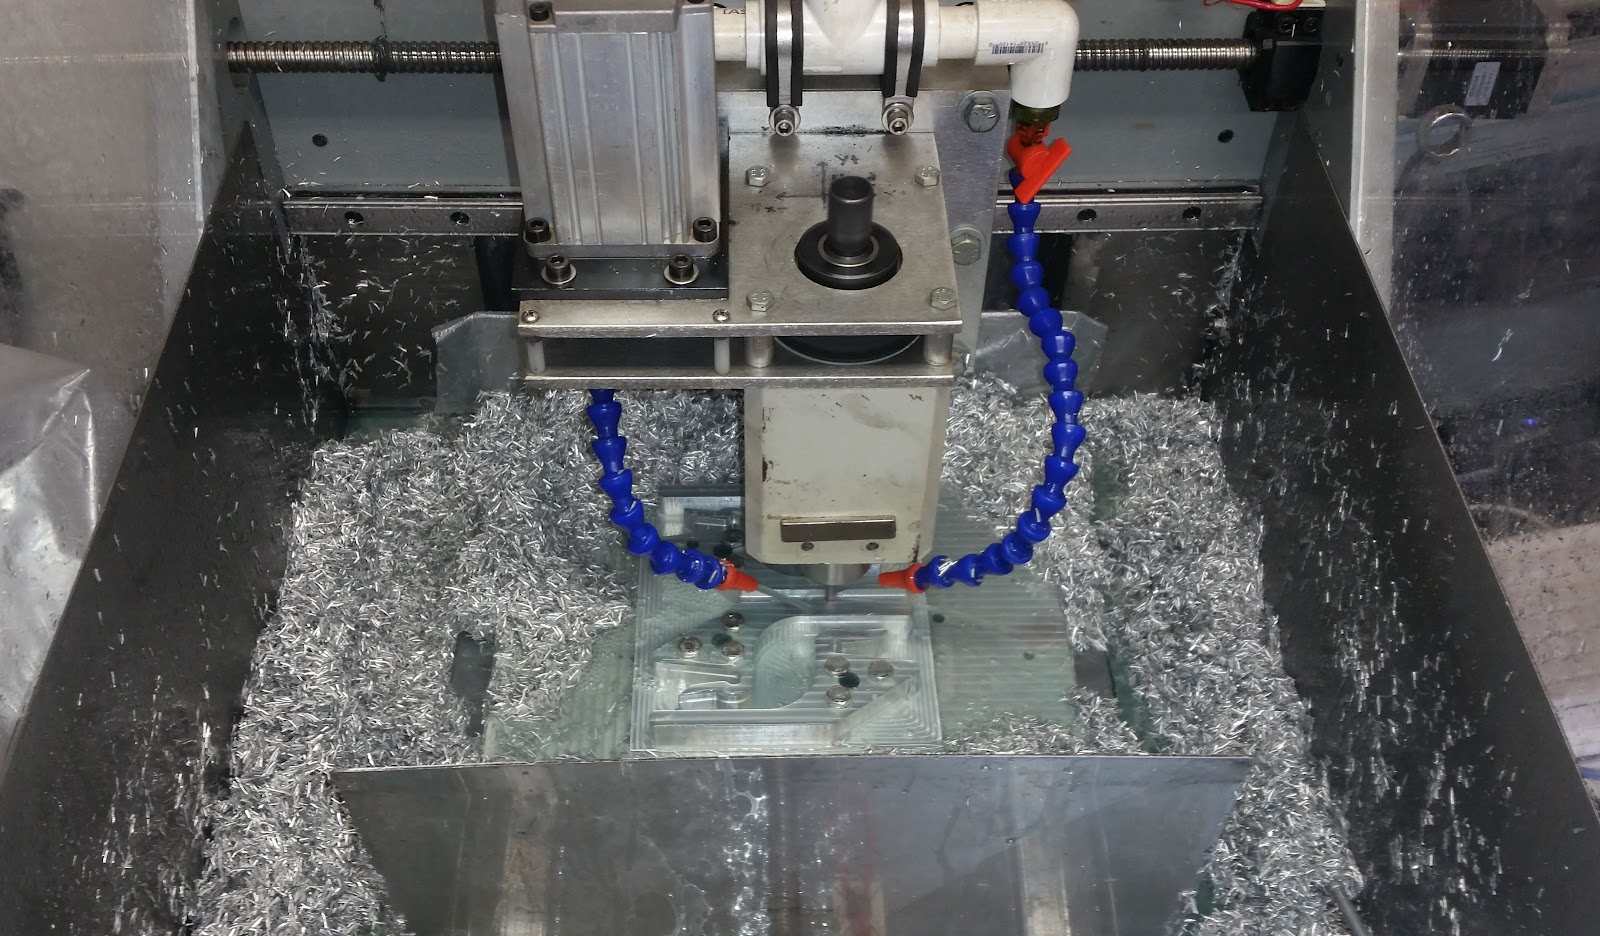
CNC milling machine cutting chips!
Mark: So what other kinds of custom machining work do you do? What kinds of projects do you most want to take on?
Mike: I also do manual lathe turning work. Having welding, milling, and turning capabilities allows me to handle 95% of the projects imaginable. I am a mechanical design engineer by day and I offer that experience to my machining clients if they request it.
I generally enjoy doing prototyping and custom work. Small production run and one-offs. I generally favor work which aligns with my personal interests, so custom automotive and motorcycle work is always welcome! Keeping machining enjoyable is very important to me. Custom work allows me to do this.
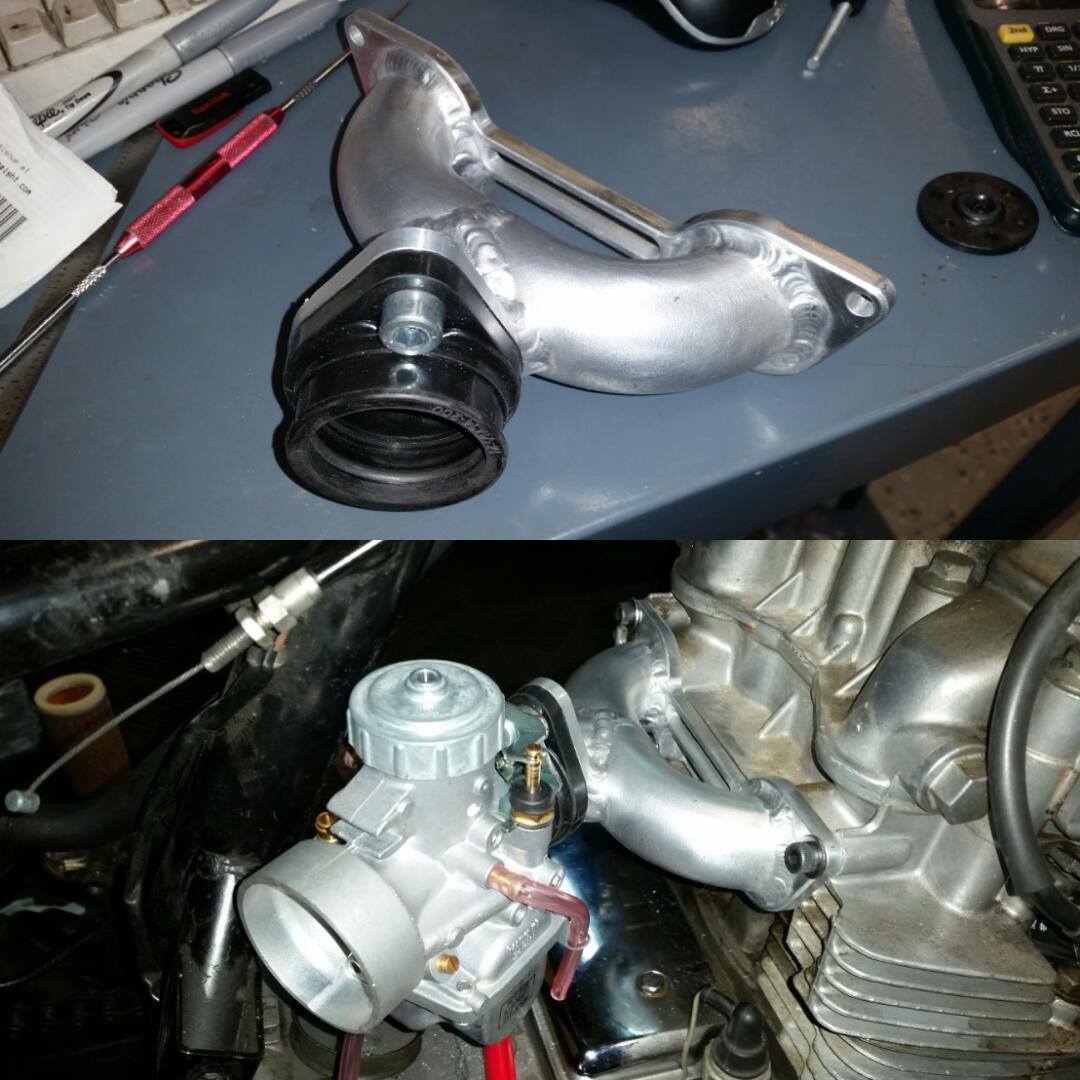
ChathamCNC fabricated single carb conversion manifold for a 1976 Kawasaki KZ400.
If you would like to learn more about Mike, visit his site at http://www.chathamcnc.com/
The Triangle Miata Roadster club visits Automotive Performance & Chassis
This past weekend we hosted an event for Raleigh’s local Miata club members. It was held Sunday and attendance was great:

It was fun for AP&C to meet all the Miata owners and get to see their cars. There was a low-numbered original from 1989 as well as great examples of the generations that followed.
We gave the folks a tour of our facilities and then introduced them to the “Black Miata”, a track day version of a 1996 “M” model.

It was used to show the Miata owners how a track alignment was done and what factors were involved in corner balancing a road racing Miata.

We introduced the terminology of alignments: caster, camber, and toe. Along with that was an explanation of how each aspect had its effect on handling.

Then we put the car up on scales and let everyone see how the process of corner balancing was accomplished and what the ideal results were.

The club members were able to interact with the technicians and staff, often asking questions pertaining to their own Miatas. Not everyone is looking for a track car, but often would like to enjoy an improvement in handling in their fun roadsters.

At the conclusion everyone was invited for lunch at the Train Station Bar & Grill next door where there was plenty of great food and service that was discounted for the members.
We enjoyed having the opportunity to meet with automotive enthusiasts and have the time to listen to their questions and help them with their desires for getting even more enjoyment from their cars as well as consulting on any problems they might be experiencing. AP&C not only provides track preparation services, but also provides maintenance and common services for daily drivers. We handle air-conditioning, cooling services, timing belt and water pump replacement, fault code diagnosis, as well as tire, wheel and chassis service.
If you are a member of a local car club and would like to hold an event at our shop please give us a call at 919-319-3484. We would enjoy the opportunity to help your members.
Miata Club Suspension Day April 24
Sunday, April 24, at 10:00 in the morning AP&C will host a suspension tuning clinic for the area’s Miata club. As a special guest will be the Black Miata track car of Jim’s Garage fame.

If you have a Miata or an interest in how a track Miata is set up please feel free to join us at the shop that morning.

There will be plenty of parking and we will explain how corner balancing enhances the driving experience and how a track alignment can provide more grip.


The Train Station Bar & Grill next door to our shop will be offering overflow parking as well as discount meals for attendees. So let us know if you can join us!
Tar Heel Sports Car Club Tech Day at AP&C

We love it when we can host a local car club and we are especially happy to have THSCC use our facilities to perform their tech inspections of cars and helmets that will be participating in their many track and HPDE events.

The cars are fantastic to see with some great marques and interesting modifications.


The THSCC members perform careful inspections in the interest of track safety. People have the time of their lives at these many events throughout the year and they appreciate someone looking over their ride to ensure that there are no unwanted surprises that would curtail their fun.


The people braved a very cold day to get their rides inspected and certified track ready by the THSCC team. There was coffee and doughnuts to help warm things up and there was plenty of time for some great conversations concerning last year’s events as well as the up-coming ones this year.


The THSCC is a great local club that we are happy to have use our shop. We look forward to working with them and other clubs in the coming months.
A Big Brake Upgrade for a 1992 Toyota Pickup
In the past I’ve shared my adventures with my 1992 Toyota Pickup truck, a.k.a. the Chick Magnet. I’ve had the truck for about sixteen years and it has been a journey of repair and improvements.

Its been re-painted, re-upholstered, it has had its suspension rebuilt, and it has a wonderful engine built by the folks at LC Engineering in Arizona. The only area that it seemed lacking in was brakes. The stock brakes were essentially adequate, but as more power was added to the drivetrain they developed a bad habit of pulsing and feeling a bit weak.
I looked all over for “big brake” options. There are some nice aftermarket solutions that use Willwood calipers and larger rotors. My problem with that solution was that it required larger wheels, usually 17” rims. I just didn’t want to make that investment all over again since I changed to XD122 Enduros in 15” and liked the look as it allowed me to keep a wide enough sidewall that it still looked like a truck.
So what to do? I explored several forums and learned what other Pickup owners had done. Most of them were 4WD trucks and mine is a 2WD. Others had swapped out their 22RE for a Chevy LS engine. Buried in all the information was a 1 ton version of my truck that had much larger calipers and bigger rotors that just might be a bolt-on swap. Would it really be a bolt-on? I decided to locate the parts and give it a try.
Rockauto had some 1-ton PD66 type calipers and rotors for a very good price. If I was going to gamble I would at least try there so my budget wouldn’t take a big hit if it was a mistake.
With larger calipers that had much larger pistons than my original calipers I knew that I would need to upgrade my brake master cylinder from the stock 7/8” piston to something larger so I found a Toyota one that had a 1 and 1/16” piston to replace it with.
Then came the weekend that I had time to put the package together. My hope was that since everything was Toyota that it would not mean fabricating a new caliper bracket or drilling and tapping new mounting holes.

The above photo shows the 1-ton calipers on the left and the originals for my 1/4-ton on the right. The new ones are not only larger, they have a nice cadmium plating to help keep them looking good for a long time.
I removed the original sized rotors from the hum and bolted up the larger 1-ton rotors. Everything fit like a glove and they even were not too large for the splash shields.

Above are the stock rotors and hub with the mounting bolts removed.

The new rotors bolted to the original hub just fine.

As you can see above, the big rotors still fit the factory splash shields even though they are a larger diameter.

Here you can see that the 1-ton rotors are a bit larger in diameter than the stock, but that size differential makes a big difference.
The only thing that needed modification on the splash shields was the area where the larger caliper brackets needed to bolt up. A little work with some tin snips and a ball-peen hammer and the brackets fit perfectly.

Then the new brackets were bolted up.

Followed by the pads and new calipers.


There was only one piece of fabricating required. There is a flex hose brake line that connects the the hard line on the caliper to the hard line on the chassis. The hard line on the caliper was kept in place on the old caliper by a bracket.

There was a different metal bracket to work with the 1-ton calipers, but Toyota no longer has them available and I was unlikely to find a 1-ton in a local recycling yard. So I got new hard lined for the calipers, they were the same as the ones on the old calipers, and cleaned up the metal brackets.
What I needed was a piece to bridge the 1.75” gap between the small caliper bracket and the mounting hole on the new, big caliper. So I fabricated the metal bridges.

I made a square hole in one end so that I could use a smooth headed carriage bolt on one end. A regular bolt head would have interfered with the caliper bracket mounting bolt.

A nylock nut was used on the carriage bolt so there should be no danger of it vibrating loose in the future.

Above is another view of the caliper and the bracket bridge where you can see where it could have interfered with the caliper bracket mounting bolt.
All the bolts were checked for proper torque and the new master cylinder was swapped in place of the smaller stock unit. All the hard brake lines matched up perfectly to the new master cylinder and the system was bled before a test drive.
So how are the new brakes? Wonderful. I get a lot more braking capacity and the pedal feel is even better with the larger bore master cylinder.
The guys at the shop joke about it being the first pickup truck that can do an “endo”. Actually the performance is so good that the brakes are easier to modulate and the brakes are so heavy duty that I probably won’t need to replace the pads for another 100,000 miles. They are easy to modulate and don’t grab and lock up. Instead they have plenty of reserve capacity and great pedal feel.