 We installed a Mcleod RST 9.5″ dual disk clutch in this 2002 C5 Z06. While the factory clutch was still holding, with 120,000 miles on the clock, this was both preventative maintenance to freshen up the car, and a solid foundation for future horsepower building plans of the owner including the potential for a supercharger. There are a wide variety of clutch options available, including a stock replacement 10.5″ clutch good to about 450hp or an upgade to the LS7 11″ clutch with additional headroom over 600hp. Larger diameter driven disks have more friction area, but along with the larger pressure plates, can add additional weight and rotating mass. High performance pressure plates with higher plate loads can accommodate higher horsepower, but bring increased pedal effort.
 As this car serves as a daily driver and sees rush hour stop and go traffic, the owner wanted to maintain near stock pedal effort while shaving weight for quicker revs and still adding greater power handling capability for the future. The dual disk kit uses twin 9.5″ solid hub disks (no damper springs), a floater plate, and a diaphragm style pressure plate and is rated to 800hp.
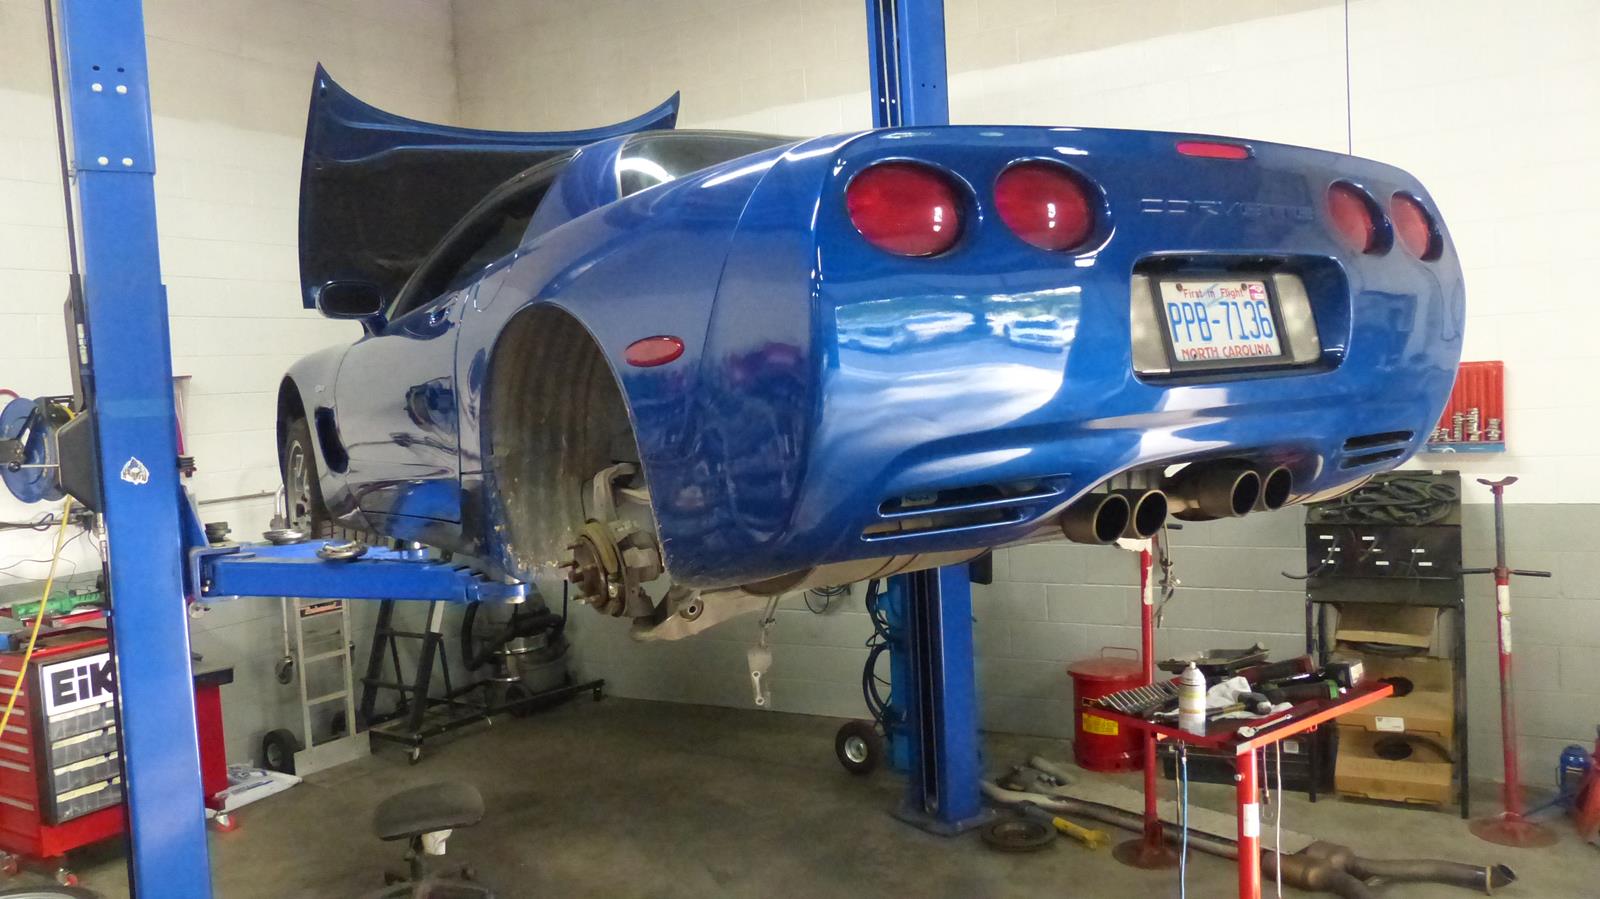
We began by removing the exhaust system and torque tube shield, and then disassembled the rear suspension and brake components to allow the rear suspension cradle to be removed as an assembly while under car supports to hold the engine and transmission / trans-axle in place. There were many components to disconnect including shocks, sway bars, brakes, upper control arms, and various wiring and connections to the transmission and rear end.  With the rear cradle out of the car, we disconnected the clutch line, removed the shift knob and freed up some pieces in the console, and finally unbolted the torque tube from the bell housing and slid the entire assembly to the rear and safely lowered it with a transmission jack.
The transmission showed some minor seepage of oil and the accumulation of 120k miles of dirt. The hydraulic release bearing was not leaking but the bearing showed significant radial slop and definitely was due for replacement. Next we removed the pressure plate, disk and flywheel from the engine while leaving the bell housing in place. Clearance to
the top bell housing bolts is extremely tight. Be sure to fully support the engine to avoid damage to the firewall and engine components.
 With the flywheel out of the way, and ready to head to the machine shop for resurfacing, we noted minor oil seepage around a rear cover on the engine block. While it did not absolutely require replacement, this is a 15 hour job and the investment to clean the block and replace the seal along with installation of a new main seal and pilot roller bearing made sense as solid insurance against future troubles.
 The flywheel displayed only minimal signs of heat as did the pressure plate. The driven disk appear to have significant life left in it, a testament to the high quality materials GM chose. Additionally, the pressure plate appeared to contain more than your average amount of engineering with cooling vents stamped into the cover that would create air flow as the assembly spun.
 The four double wound springs in the clutch disk help absorb drive line shocks and decrease gear rattle in the transmission. When moving to solid disks that do not contain these springs (as with our dual disk install) be prepared to hear more rotating gear noise from the rear of the car with the clutch out in nuetral, and some gear rattling noises when lugging the engine at low RPM, especially while accelerating from low speed (10-20 mph ) in 2nd or 3rd gear. This sound will only persist for a second or two, but should be considered in advance.
While waiting for the flywheel to return from the machine shop, we cleaned the torque tube and transaxle assemblies, brushing the input shaft splines to remove any rust and ensure smooth engagement with the splines in the new clutch disks.
 Next, we installed the new clutch release bearing.
With the flywheel back and installed on the crankshaft, oriented in exactly the same position as when it was removed, we installed the gold adapter ring, the first disk, the floater plate, the second disk, and finally the new pressure plate. Be sure to use the alignment tool and install all components so that the index mark (in black) lines up.
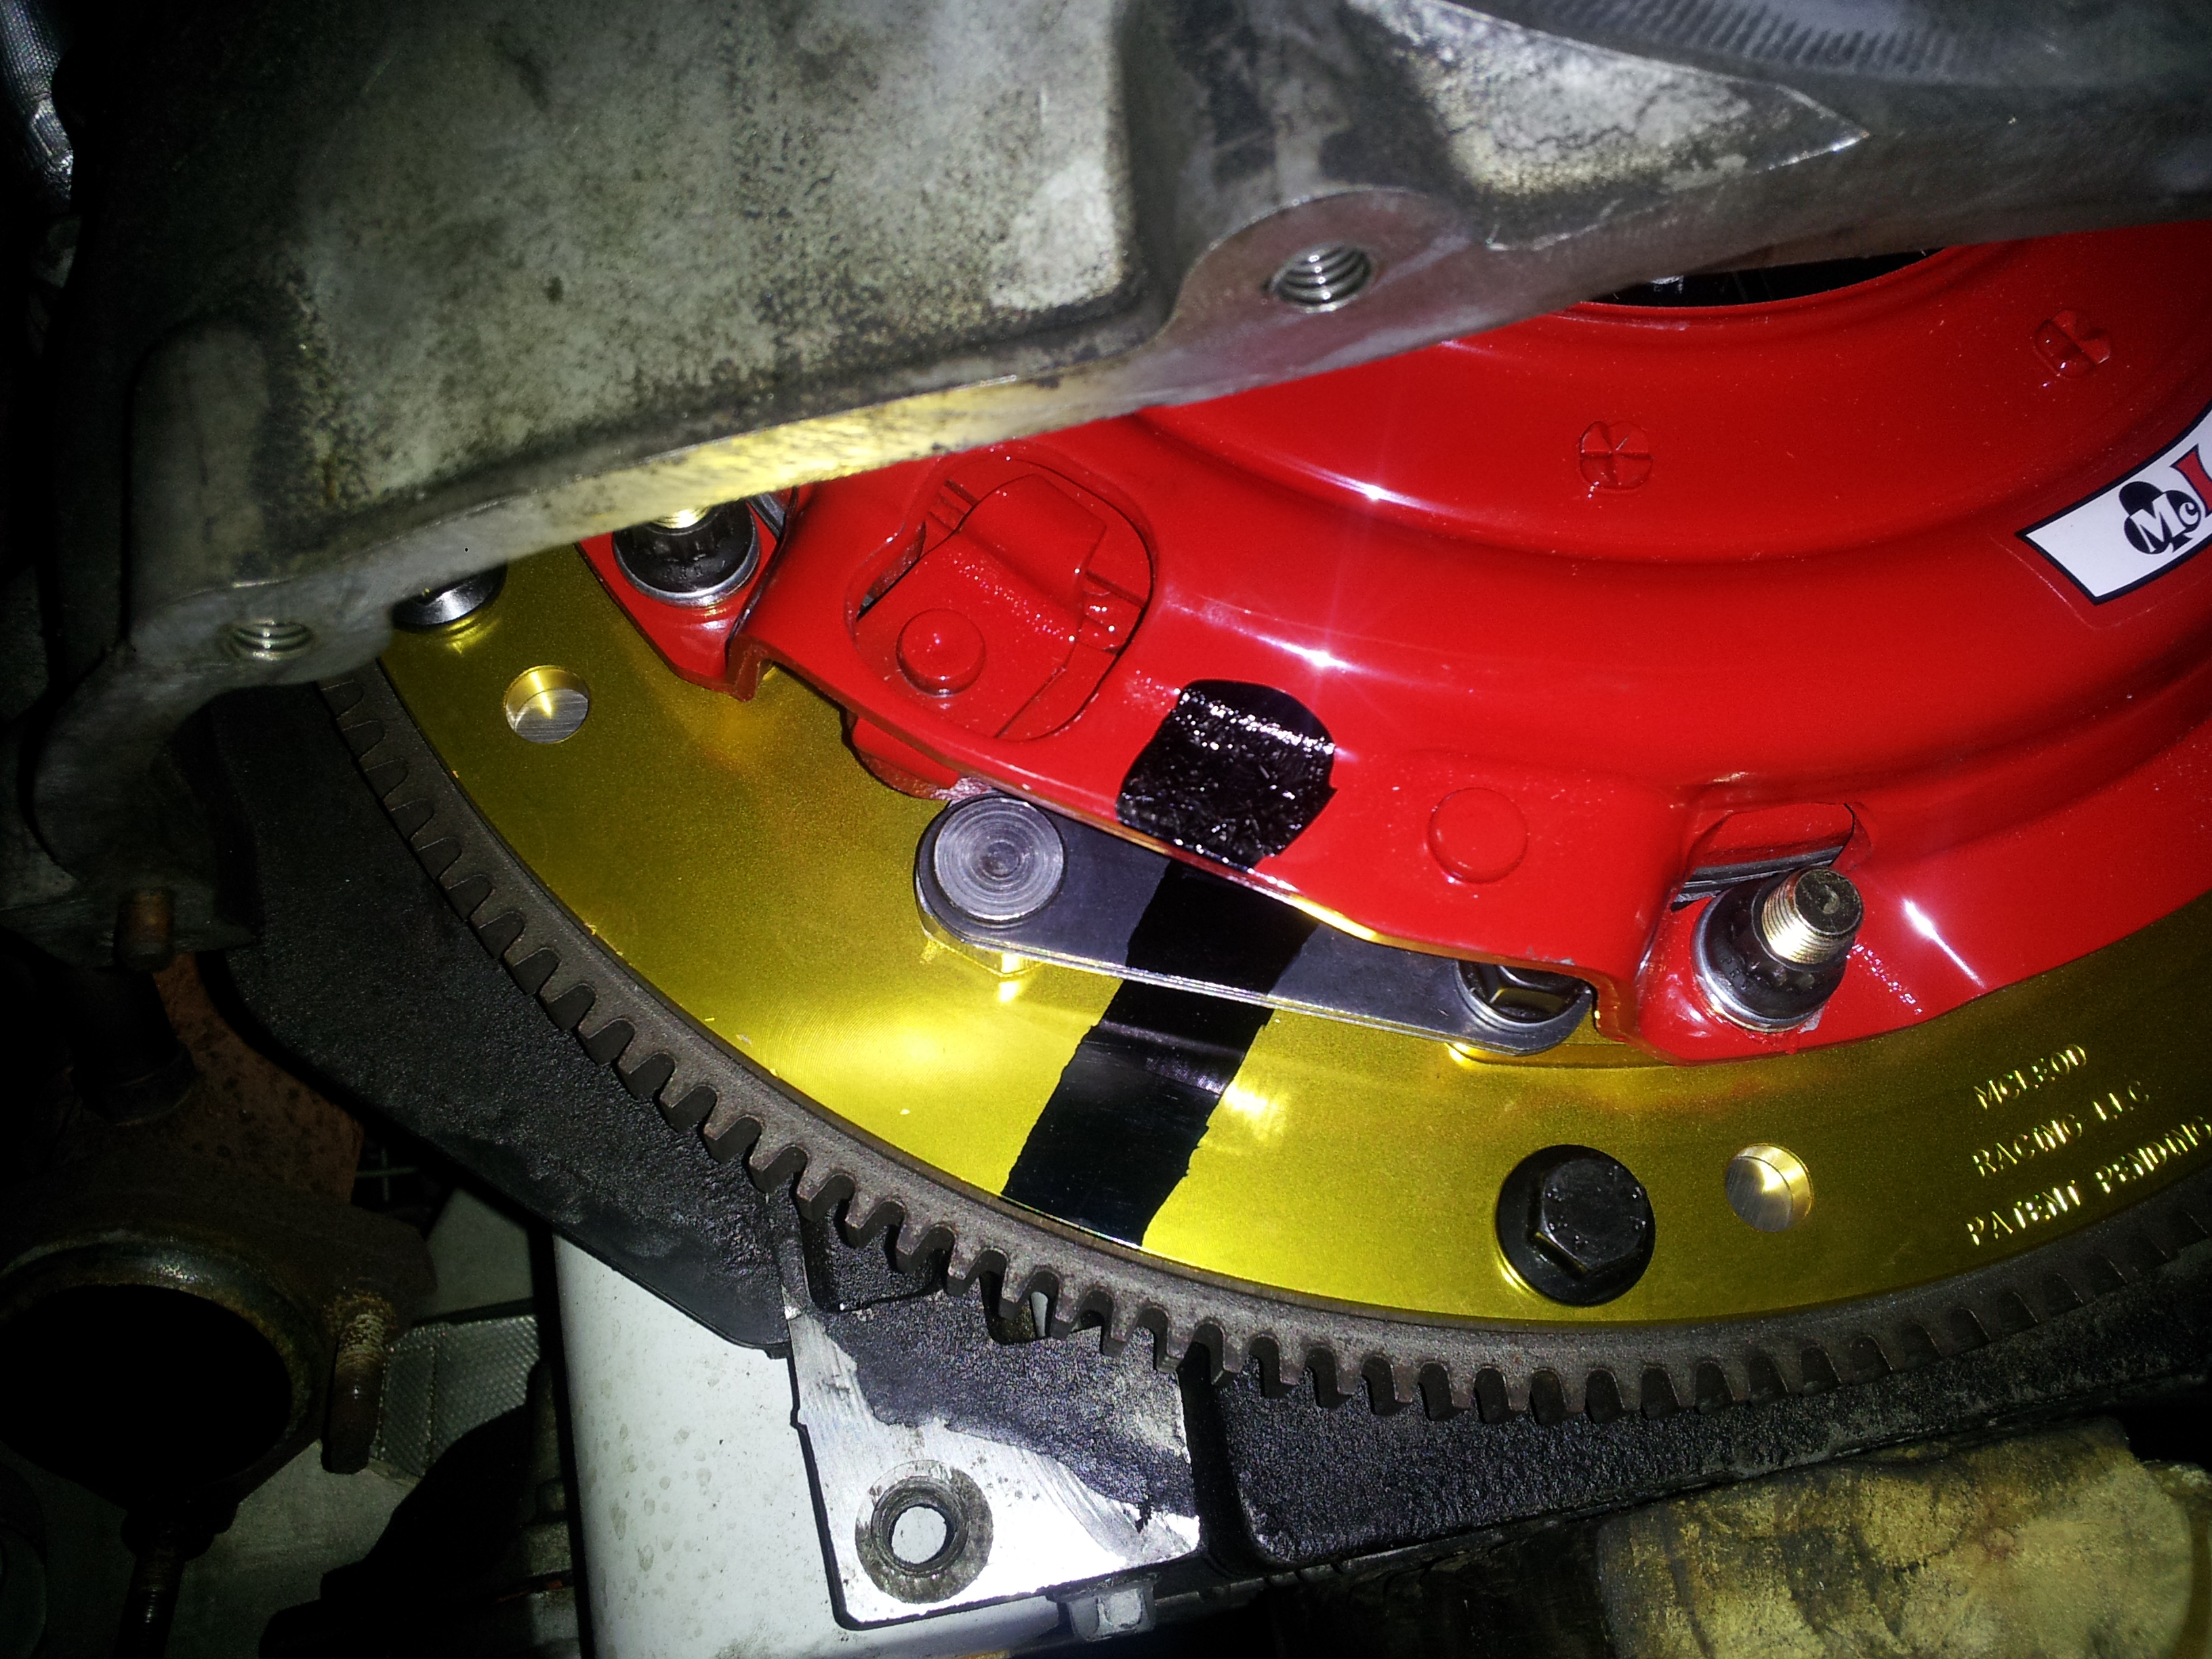 This assembly was balanced at the factory, and this alignment mark ensures it will be balanced once installed. As there are factory production variances, some flywheels have additional weights installed in them and it may be advisable to have a machine shop balance the flywheel you plan to use (factory or aftermarket) along with your new clutch set to ensure smooth, vibration free operation.
With the clutch assembly in place and correctly torqued, it was just a matter of putting it all back together and taking it out for a test drive. The clutch feel was very similar to stock, and the organic disks in the RST kit engaged smoothly with no chatter. There is a 500 mile break in period where normal mix of city and highway driving is recommended before the clutch is used for more performance oriented driving.